If your external doors are looking past their best, it might be time to consider refreshing them. Painting a front door is a brilliant, easy way to give your property some WOW factor and refresh your kerb appeal without breaking the bank.
At Doordeals, our experts have compiled their knowledge into this handy guide walking you through the process of painting your front doors; from the tools you’ll need to perfecting the job with the finishing touches. Discover how to breathe some new life into your old doors and get started refreshing your home’s exterior.
Why Should You Paint a Door?
Painting your front door not only allows you to refresh its style and repair any damage, it's also a cost effective solution to replacing your front door, if your interior style changes over the years.
Painting VS Replacing
Painting a door and replacing its ironmongery and accessories is significantly cheaper than replacing, as you’ll see below, So, it’s well worth considering if the door itself is still performing well. Another benefit to painting your doors is the ease of DIY. It’s far easier to paint a door, than hang a new one in its place; something we always recommend a skilled professional do to ensure security and proper function.
How Much Does it Cost to Paint a Door
Painting a door yourself costs on average £50 for the paint and materials needed to carry out the job. This can vary if you’re replacing door accessories and handles but still a saving compared to the average cost of a front door starting at £500. Having your front door professionally painted or sprayed costs an average of £300. So opting for the DIY route can save you some serious money, while refreshing your front door and upping your kerb appeal.
Can I Paint my Front Door?
Yes, you can paint your front door, either yourself or opting to hire a professional as we’ve mentioned. Painting your front door yourself saves money but
Let’s take a look at what you’ll need to get started.
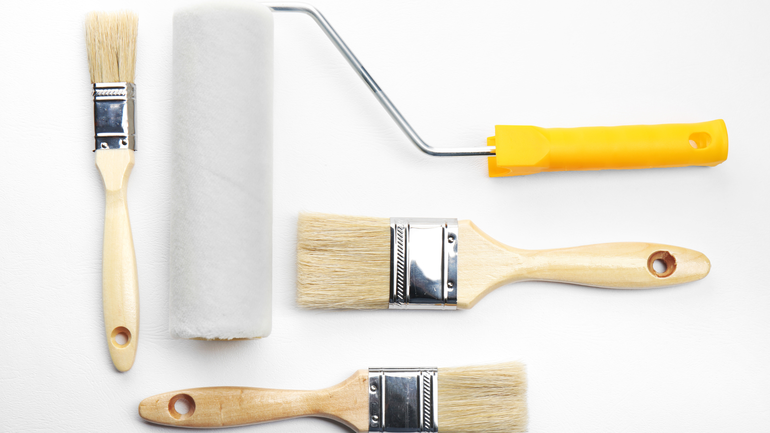
Equipment You’ll Need:
Before you get started painting your doors, these are the tools and equipment you’ll need:
- Dust sheets and protective coverings (for inside the home and outside areas)
- Sand paper (for prep)
- Cloth (to wipe down after sanding)
- Primer (if required, refer to the instructions for your chosen paint)
- Paint brushes (of varying sizes for the details)
- A foam mini roller
- A paint tray
- Masking tape / Decorators tape (for taping off glazing etc)
- Screwdriver (to remove door hardware)
Additional equipment you may require:
- Wood filler (to repair holes in wooden doors)
H2: How to Prep a Door for Painting
Before you start painting your door you need to make sure it’s prepped and primed so that all your hard work doesn’t go to waste. If done correctly, a painted front door stands the test of time even when up against the elements. To properly prep your doors for painting follow these steps:
1. Remove Hardware and Clean the Door
Start off with a blank canvas; remove all hardware and accessories and use hot soapy water and a cloth to clean the door thoroughly, particularly the external side.
2. Repair Any Damage
If your door has any areas which are damaged, fill and repair these with relevant products such as wood filler for wooden doors. Once filled and dried make sure you sand these down flush with the surface of the door.
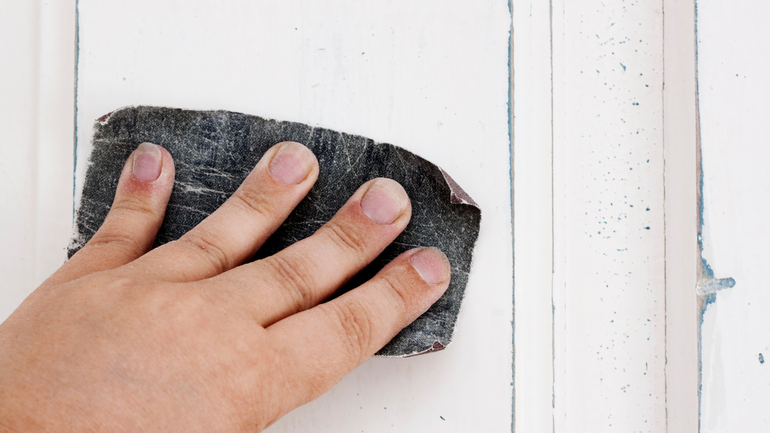
3. Sand and Dust
Lay down your dust sheets to protect the area surrounding your doors before starting the messy jobs.
Sanding your door ensures that paint adheres to the surface helping your doors look their best for longer. If you are painting a UPVC or painted door, sand this down well to buff out any shine and gloss. If you are painting a wooden door for the first time, sand this down gently making sure any sealants have been buffed away.
Once sanded, clean the area with a clean damp cloth making sure to pay attention to any details or panels where debris may have gathered.
Let the door dry naturally or dry this with a clean, dry cloth or towel.
4. Tape The Door
Using masking tape or decorators tape, carefully tape off all the areas you don’t want to paint such as glazed panels.
5. Prime The Door
Using a combination of brushes, for details and corners and a foam roller for larger surfaces apply an even layer of appropriate primer to the door. Not all doors will require primer, if your door has previously been painted or you are using a paint and primer combination you may not need to use primer. If this is untreated wood you will need to apply primer. Always check the instructions on products you are using for more information and advice.
H2: Painting a Door
- Using a paintbrush and your chosen paint, begin applying this to areas such as the moulding of panels, and any other delicate areas in the door.
- Once you have painted the intricate parts of the door, use a foam roller to paint the larger areas such as panels, stiles and horizontal rails.
- Allow the first coat of paint to dry for at least 2 hours.
- For additional coats, repeat steps 1,2 and 3 until you’ve achieved the desired look. It’s worth consulting the directions on the paint used to ensure that you’ve provided sufficient coverage.
- Repeat the process for the other side of the door.
- Replace the hardware, handles and any other accessories and remove any tape from the door.
H2: Finishing Touches
There’s no debating that painting your front door will refresh its look and feel in an effective way, and you can stop the renovations there. However, you can amplify this even more by refreshing or replacing your door handles and hardware too.
There are metal paints available to refresh door hardware and help it complement your new front door style. However, sometimes if they’re worn or not performing properly it’s worth considering replacing your door hardware to help enhance both style and security.
At Doordeals, we’ve got a brilliant selection of door hardware, fixings and accessories to help combine style and safety and bring your new style to life.